Getting started
Note
Roboception’s URCap is working with software 3.12.0 or newer for CB series, and 5.6.0 or newer for E-series. In case you are running an older software version, please update your controller (files can be downloaded from the UR website: https://www.universal-robots.com/download/)
Note
Roboception’s URCap internally communicates with the daemon on port 49285. In the unlikely event that it causes a conflict with a URCap from a different vendor, please contact Roboception support.
Roboception’s ItemPick Bundle for Universal Robots contains everything required to calibrate the robot and the rc_visard, and start your first program. The bundle is sold in two versions: with or without a RandomDot Projector.
The basic bundle consists of:
- rc_visard 160 monochrome
- rc_reason ItemPick Module
- Small Calibration-Grid with pre-drilled mounting holes
- Connectivity Kit with 5m network cable and 30W power supply
The kit including the projector consists of:
- rc_visard 160 monochrome
- rc_reason ItemPick Module
- Small Calibration-Grid with pre-drilled mounting holes
- Connectivity Kit with 5m network cable and 60W power supply
- RandomDot Projector
- rc_reason IOControl Module
Software installation
- Download the URCap from Roboception’s download page
- Copy the URCap file to a USB flash drive
- Insert the USB drive into the USB port of the teach pendant or robot controller
- On the Welcome screen of the PolyScope Robot User Interface press the Setup Robot button first and then press the URCaps Setup button
- Click on the + button to install a new URCap application
- Navigate to the rc_visard_urcap file by clicking on your USB drive and selecting it. Confirm the selection by clicking on Open
- Reboot the controller
After rebooting the robot, the rc_visard_urcap application should be marked by a green tick in the URCaps Setup window (see Fig. 58).

Fig. 58 Successfully installed rc_visard URCap.
Connect the sensor
You can connect the rc_visard directly to the ethernet port of the Universal Robot controller, or through a network switch. During setup, it is recommended to establish a connection via switch, since some parts of the rc_visard interface are not fully duplicated in URCap and are only available through the Web GUI. It might be necessary to use an external PC to configure the rc_visard or its software modules.
Detailed instructions about network setup can be found in Network configuration tutorial.
- Connect the rc_visard to the same network as the robot controller
- Enable networking in PolyScope
- In the installation node, set the IP address of the rc_visard
Note
A Link-Local address might change after reboot, therefore, we recommended assigning a static IP address or using a DHCP server for network configuration.
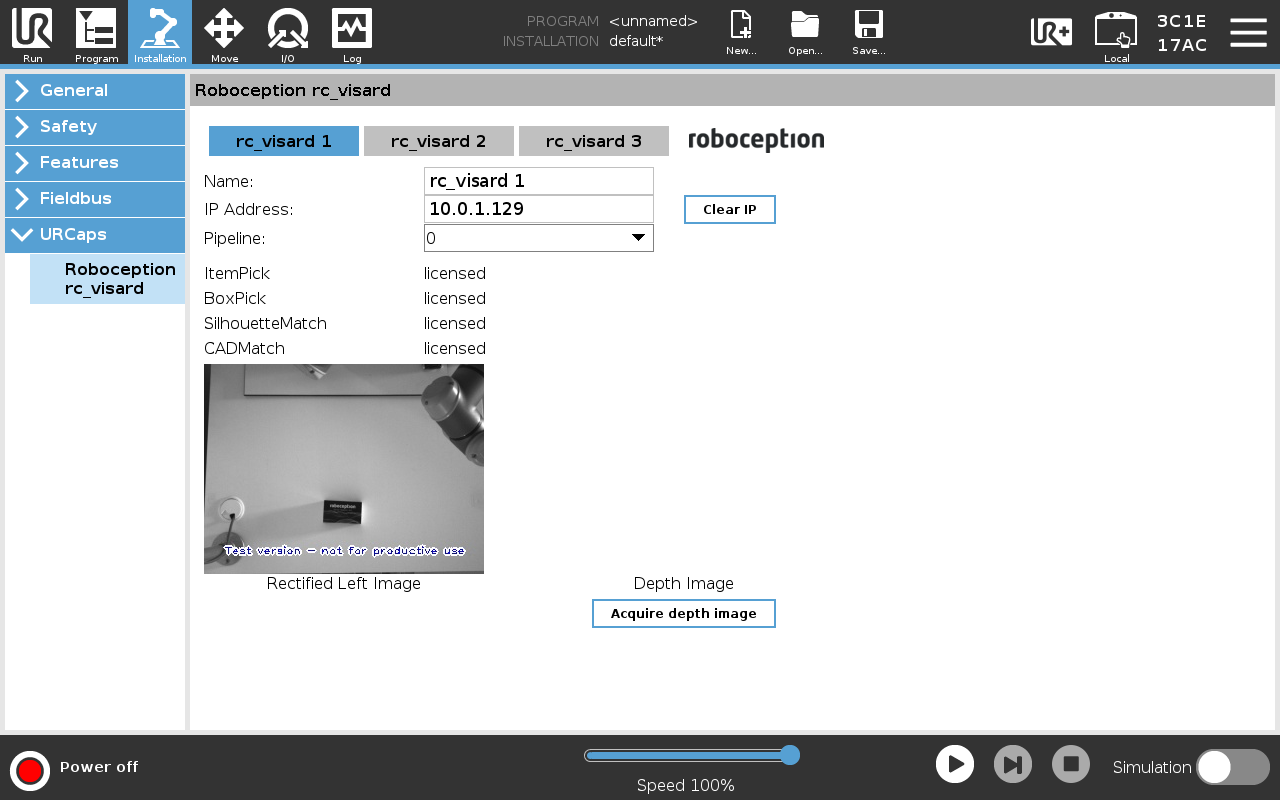
Fig. 59 Sample setup. The robot has established a connection to the rc_visard and displays status information and the rectified left image.